[Product links are listed down below | Todos los enlaces de los productos se encuentran abajo]
Hello everyone! It's me, Cha! I'm so happy to have received My Monthly Hero kit - June 2018. I love this kit because you can create many sunny scenes. When you see the kit, the first thing that came to your mind is to create a beach scene but, in my case, I wanted something more different... I imagined myself in a boat looking through a window and watching the hills, the sea, and the sunset! And... this is what I made.
¡Hola a todos! Soy Cha. Estoy muy contenta por haber recibido el kit de Hero Arts del mes de junio 2018. Me encanta este kit porque puedes crear muchas escenas veraniegas. Cuando ves el kit, lo primero que te viene a la mente es crear una escena de playa, sin embargo, en mi caso, quise crear algo diferente... Me imaginé a mi misma en un barco mirando a través de una ventana y observando las colinas, el mar y una puesta de sol. ¡Y esto fue lo que creé con este kit!
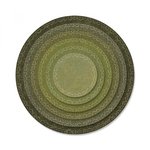
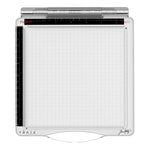
First, I used the stitched circles dies by Tim Holtz. I picked the second largest die from this set and made a pencil line on a piece of cardstock. I wanted to know the limits for creating my scene. When it was done, I positioned this piece onto the base of the Travel Stamp Platform by Tim Holtz in order to start my scene.
Primero, utilicé el set de troqueles de círculos de Tim Holtz. Escogí el segundo troquel más largo del set y lo marqué con un lápiz en una cartulina blanca. Simplemente quería saber cuales eran los límites para la creación de la escena. Más tarde, posicioné la cartulina en la plataforma de estampación de Tim Holtz para comenzar a crear la escena.
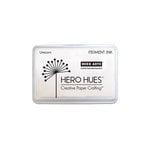
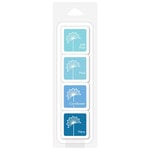
I decided to stamp the sea from the kit that has three layers. I added the first stamp layer of the sea which is included in the kit. I inked it with fiesta teal several times. This Hero Arts ink cube is included in the May kit 2018 and it is still available! I inked the same stamp with summer sky ink. I heat it a little bit before moving to the second layer. For this second layer, I inked it with sapphire. This ink was included in December kit 2017 and, unfortunately, it is not available anymore. I heat it a little bit again. For the last layer, I stamped it with unicorn pigment ink. I heat it again and inked with aquatic over it in order not to be too white.
Decidí estampar el sello principal del kit - el mar - que consta de tres capas. Añadí a la plataforma la primera capa y mezclé dos tintas de Hero Arts - fiesta teal (incluido en el kit de mayo y que se encuentra todavía disponible) y la tinta summer sky. Sequé un poco la tinta con la pistola de calor. Luego posicioné la segunda capa y la tinté con el color sapphire. Esta tinta ya no está disponible ya que venía con el kit de diciembre 2017 y se encuentra agotado. Volví a secar la tinta un poco con la pistola de calor. Para la última capa, utilicé la tinta de pigmento unicorn. Sequé un poco la tinta y volví a estampar la misma capa utilizando la tinta aquatic para que no quedara tan blanco.
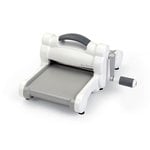
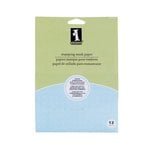
Later, I masked the part of the sea with post-it notes. I cut a circle in a piece of Inkadinkado masking paper, and added this piece in the middle, between the sea and the sky. My aim was to create the sunset with the sky on top and the sea at the bottom. For creating the sky with the sun, I first colored the edges of the circle that I marked with a pencil line previously - I mean the biggest one. I used soft sky ink. Then, I colored with fiesta yellow (included in May kit 2018) and blended it with the previous color a little bit. Later, I colored the edges of the masked circle with butter bar. Then, I removed all the masking and I blended a little bit the yellow tones. Besides, I cut the scene following the pencil lines using my die cutting machine, the Big Shot and the stitched circle.
Más tarde, enmascaré la parte del mar con notas post-it. También corté un círculo con papel de enmascarar Inkadinkado, y, añadí este círculo en el medio, entre el mar y el cielo. Mi objetivo era crear la puesta de sol con el cielo en la parte superior y el mar en la parte inferior. Para crear el cielo con el sol, primero coloreé los bordes del círculo que había trazado con lápiz anteriormente. Utilicé la tinta soft sky. Entonces coloreé con la tinta fiesta yellow (incluido en el kit de mayo 2018), y lo mezclé con el color anterior un poco. Más tarde, coloreé los bordes del cículo que enmascaré con la tinta butter bar. Luego, quité todo el papel de enmascarar y mezclé un poco los tonos amarillos. Además troquelé la escena que había trazado con lápiz utilizando la big shot y el troquel de círculo de Tim Holtz.
Also, I stamped a dividing line at the horizon with Versafine onyx black ink. I used the third layer of the sea, inking just the top part of the stamp and stamped it a couple of times. For creating the hills, I picked the rock stamp from the kit, and I stamped several times on the left, just on the horizon - when the sea touches the sky. I also stamped some clouds using unicorn pigment ink and some birds using Versafine onyx black ink. I slightly colored the sea with fiesta yellow in order to give some reflection to the sea.
También estampé una línea divisoria en el horizonte con la tinta Versafine onyx black. Utilicé la última capa del sello (el del mar), y tinté solo la parte superior del sello con la tinta Versafine onyx black, eliminando el excedente. Para crear las colinas, escogí el sello de roca que venía con el kit, y lo estampé varias veces en la parte izquierda de la escena, solo en el horizonte - donde el mar toca el cielo. Estampé algunas nubes utilizando la tinta de pigmento unicorn y algunos pájaros utilizando, también, la tinta Versafine onyx black. Además coloreé el mar ligeramente con la tinta fiesta yellow para dar reflejo al mar.
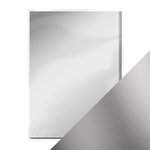
For mounting the card, I cut a circle in front of the white notecard (the largest circle die of the set - Tim Holtz stitched circles). I also cut a frame. I picked the largest and the third largest circle die and aligned on top of a piece of silver mirror cardstock. I passed through my die cutting machine. This piece would be the window of the boat. I also created a frame using black craft foam. So, I cut a piece of acetate and glued on top of the white notecard, just right on top the window that I cut. Then, I adhered the circle frame of black craft foam and, finally, I added the silver mirror frame on top. Inside the card, I glued the circle scene that I created.
Para montar la tarjeta a su base, primero corté la parte frontal de la tarjeta base, utilizando el troquel de círculo más largo. Para crear el marco de la ventana, escogí dos troqueles de círculo (el más grande y el tercero más grande). Los alineé y los corté cartulina de espejo (color silver - plata) utilizando la máquina troqueladora (la Big Shot). También, corté otro marco pero de goma eva o foamy negro. Además, recorté un círculo de acetato para crear la ventana. El trozo de acetato lo pegué sobre la tarjeta base, justo encima de la ventana que corté anteriormente. Entonces, adherí el marco cortado en goma eva o foamy, y, justo sobre este, pegué el trozo de cartulina de espejo. En el interior de la tarjeta, pegué la escena circular creada.
I stamped my sentiment from the main kit at the bottom of the front window using Versafine onyx black.
Estampé la frase que venía también con el kit en la parte inferior de la ventana, en la parte frontal de la tarjeta base. La frase la estampé con la tinta Versafine onyx black.
For final touches, I decided to give some shimmer on top the sun with my Nuvo shimmer pen. I also added some dots around the window frame using Nuvo Drops - ivory seashell, simulating a metallic boat window.
Para toques finales, decidí dar algunos toques de purpurina al sol utilizando el Nuvo shimmer pen. También añadí algunos puntos alrededor del marco de la ventana utilizando Nuvo Drops - ivory seashell, simulando una ventana metálica de un barco.
And... that's all for today! I hope you like this card so much as I do! Thank you for stopping by and stay tuned for my next project!
Y... ¡esto es todo por hoy! Espero que les haya gustado tanto esta tarjeta como a mi. Gracias por pasarte por aquí y... ¡hasta pronto!











.jpg)


0 Comments