[Product links are listed down below | Todos los enlaces de los productos se encuentran abajo]
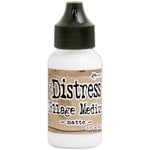
Hello there! It's me, Cha! Today I made a card using again the kit from Hero Arts - MMH June 2018 but, this time, I created a beach scene. This card is too simple to make and I really loved the way of creation for this card. Also, I used Translucent Embossing Paste for giving some highlights to the card.
¡Hola a todos! Soy cha. Hoy he creado esta tarjeta utilizando nuevamente el kit de Hero Arts de junio 2018 (MMH June 2018) pero, esta vez, he creado una escena de playa. ¡Esta tarjeta es super fácil de crear! Y, además, me encantó el proceso de creación. También, utilicé una pasta de embossing translúcida para resaltar detalles en la tarjeta.
Hello there! It's me, Cha! Today I made a card using again the kit from Hero Arts - MMH June 2018 but, this time, I created a beach scene. This card is too simple to make and I really loved the way of creation for this card. Also, I used Translucent Embossing Paste for giving some highlights to the card.
 |
| A Blog Named Hero Challenge | Reto Verano Divertido |
¡Hola a todos! Soy cha. Hoy he creado esta tarjeta utilizando nuevamente el kit de Hero Arts de junio 2018 (MMH June 2018) pero, esta vez, he creado una escena de playa. ¡Esta tarjeta es super fácil de crear! Y, además, me encantó el proceso de creación. También, utilicé una pasta de embossing translúcida para resaltar detalles en la tarjeta.
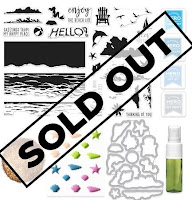
First of all, I created the background of the sea. For creating this, I decided to stamp the second layer of the sea stamp that came with the Hero Arts kit. This time, I used a large acrylic block. I stamped this layer onto the whole panel using the Hero Arts ink cube - Fiesta Teal (MMH April 2018). As I was going to add some shimmer to it, I put the panel inside of a box to avoid dirty my work surface. I sprayed some Hero Arts shimmer spray - Sea Foam. Although this Hero Arts kit (June 2018) is sold out, they have other shimmer sprays that may work with this technique. I heat set it a little bit with my craft gun and I let this panel aside to let it dry completely.
Primero, creé el fondo con el mar u océano. Para crear esto, decidí estampar la segunda capa de este sello de mar que vino con el kit de Hero Arts. Para estampar el sello, utilicé un bloque de metacrilato largo. Estampé este sello varias veces hasta que todo el panel estuviese cubierto utilizando la tinta Hero Arts - Fiesta Teal que vino con el kit de abril 2018. Como mi intención era añadir algo de brillo, puse este panel dentro de una caja de cartón para evitar manchar mi superficie de trabajo. Rocieé la tarjeta con el Hero Arts Shimmer spray - Sea Foam. Aunque este kit de Hero Arts (June 2018 | Junio 2018) está agotado (lee más sobre estos kits AQUÍ), esta compañía tienen otros shimmer sprays que podrían funcionar para esta técnica. Sequé un poco la superficie con el shimmer con mi pistola de calor o embossing y la dejé a un lado para que se secara completamente.
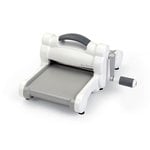
When this sea background was totally dried, I picked the "hello" die cut (MMH March 2018) and I positioned at the top of this sea background. I passed this through my die cutting machine (Big Shot machine). After that, I attached this piece onto a white notecard. I added the piece of hello to the gap as a guide to add the small pieces from the die cutting. When I finished positioning all the small pieces, I removed the word. So, now, I have a colored background with a white word.
Cuando este fondo con el mar estuviera totalmente seco, escogí el troquel con la palabra "hello" que vino con el kit de Marzo 2018 de Hero Arts. Positioné este troquel en la parte superior y lo corté utilizando la troqueladora manual de la Big Shot. Después, pegué este panel con el mar sobre una base de tarjeta de color blanco. Volví a añadir la pieza de "hello" en el hueco que había troquelado o cortado como guía para colocar las pequeñas piezas. Cuando terminé de posicionar todas las piezas pequeñas, quité la palabra para así quedar la palabra de color blanco sobre fondo de color.
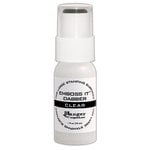
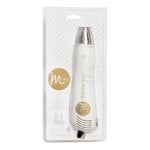
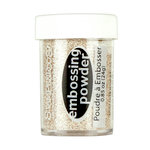
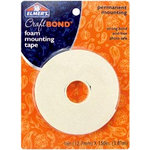
For creating the sand piece of this beach scene, I picked a piece of white cardstock and stamped the second layer of the sea stamp again. This would be a guide for cutting the piece in order to create the seashore. I cut the piece with some scissors. Next, I used my anti-static tool to do some embossing. I added the Ranger Emboss it dabber to the whole piece and added sand embossing powder that I dried it with my heat tool later. I did this process twice in order to cover up the entire piece. At this point, I wanted to create the seafoam! So, to the top of this piece, I added some translucent embossing paste with a spatula and, then, I added some white embossing powder and heat it again until the paste shows some bubbles. I glued this sand piece to the bottom of the sea background with some foam tape to give dimension.
Para crear la pieza de arena de esta escena de playa, escogí un trozo de cartulina blanca y estampé la segunda capa de sello con el mar nuevamente. Esto sería como una guía para cortar la pieza y, para así, crear la orilla del mar. Recorté con unas tijeras. Después utilicé la herramienta anti estática para realizar embossing. Para ello, añadí en toda la superficie de esta cartulina el Ranger Emboss it dabber y a continuación, añadí los polvos de embossing - arena, que los sequé con la pistola de calor más tarde. Hice este proceso dos veces para que quedara mejor cubierta la superficie entera. ¡Ahora quería crear la espuma del mar! Así que, en la parte superior de este trozo, justo al borde, añadí la pasta de embossing translúcida con una espátula y, entonces, añadí polvos de embossing blanco y los sequé hasta que la pasta burbujeara. Pegué esta pieza con el embossing de arena sobre la parte inferior del fondo con el mar con la espuma adhesiva para dar más dimensión a la tarjeta.
For my sentiment, I stamped my phrase onto a piece of white cardstock with Versamark Ink, I added some marigold embossing powder and heat it a little bit. To give more dimension to the sentiment, I embossed it twice. I cut this piece with a strip die cut (MMH March 2018). I glued this piece above the "hello" word with some foam tape.
Estampé la frase que iba a utilizar sobre una cartulina blanca con la tinta versamark ink, añadí polvos de embossing marigold y los derretí un poco con la pistola de calor. Para dar más relieve a la frase, hice el proceso dos veces. Luego, corté esta pieza utilizando un troquel de banda que venía con el kit de Hero Arts de marzo 2018 y lo pegué debajo de la palabra "hello" con espuma adhesiva.
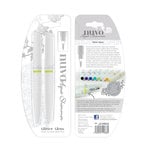
Finally, I also glued two red beach chairs over the sand piece. For this, I stamped these beach chairs on white cardstock with Altenew dye ink - heart beat. I cut them with the coordinating dies and just glued on the sand piece. I also added some shine to the chairs with Nuvo aqua shimmer pen.
Para finalizar, pegué dos sillas de playa de color rojo sobre la pieza con el embossing de arena. Para ello, estampé las sillas en una cartulina blanca utilizando la tinta de Altenew - heart beat. Corté las dos sillas utilizando los troqueles coordinados para los sellos y las pegué sobre la pieza que había creado simulando la arena. También añadí algo de brillo a las sillas de playa con el Nuvo aqua shimmer pen.
I also added some dots with glossy accents around the sentiments at the top of the card.
También añadí algunos puntos de glossy accents alrededor de las frases en la parte superior de la tarjeta.
I hope you like this summer card! and inspire you to create more and more cards!
I hope you like this summer card! and inspire you to create more and more cards!
Thank you and see you soon!
¡Espero que les haya gustado esta tarjeta veraniega! Y también, espero... ¡que se hayan inspirado para crear muchas más tarjetas de verano!
Muchas gracias y...¡hasta pronto!














.jpg)


0 Comments