Hello there! It's me, Cha! I'm sorry for being a little bit disconnected but I've been busy at work. Fortunately, I'll have some days off soon. For this card, I chose the same technique that my previous post and video but I modified it a little, just adding fun foam instead of Chibitronics lights.
¡Hola! ¡Soy yo, Cha! Debo disculparme porque estos días he tenido muchísisimo trabajo y no he podido ni sentarme un poquito a realizar tarjetas, pero bueno, dentro de poco lo compensaré porque al fin tendré varios días de vacasiones. En esta ocasión, les traigo una tarjeta con la misma técnica que la última tarjeta que realicé, pero en vez de utilizar las luces de Chibitronics, he utilizado goma eva para dar un toque de dimensión o relieve a la tarjeta.
Background | Fondo
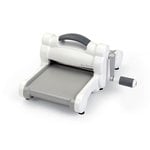
For the background, I cut several clouds on my black cardstock panel. These cloud dies came with the kit from Hero Arts last month, August 2017. However, this kit is no longer available but there are many clouds die cuts from different brands out there, also Hero Arts sells its famous Nesting Clouds Infinity Dies. For cutting these clouds, I used my cutting machine to cut those and then I stamped the sentiments and some stars that also came with the kit. Again, it has not to be the same kit like me, just play with what you have!
I stamped these images and my sentiment using Versamark ink added the white embossing powder and heat set it.
Para el fondo, elegí los troqueles de nubes que vinieron con el kit de Hero Arts. Para ello, utilicé cartulina negra de Hero Arts. Sin embargo, los troqueles de nubes ya no están disponible puesto que se agotan rápidamente pero hay muchos troqueles de nubes de diferentes marcas, e incluso Hero Arts vende su famoso nesting clouds en la que vienen muchísimas nubes de diferentes tamaños y su precio es bastante accequible si comparamos con todos los troqueles que trae. Para cortar estos troqueles, utilicé mi Big Shot y después estampé mi frase y algunos sellitos de estrellas en todo el panel principal. Y lo mismo aquí, no tiene que ser sellos del kit, simplemente se puede realizar con sellos que tengamos en casa.
Estampé las imagenes utilizando el tampón de Tinta de Versamark y a continuación añadí polvos de embossing blancos y los sequé con la pistola de calor.
Then, I took one empty carton box and put my card inside and split the shimmer mists on it. First, I used the blueberry shimmer and then, the gold one. As these two shimmers are sold out on Hero Arts Shop, you can purchase some others products that are a bit similar to these ones, such as Heidi Swapp Color Shine. Once I finished, I removed the excess of the sprays with a tissue while I was drying with my heat gun. Before everything was complete dried, I removed with the tissue (or a cloth) the shimmers from the stamps - the stars and the sentiment. I noticed when I removed the excess of the shimmers from my images, I realized that they were beautiful... like a neon look!
Cogí una caja de cartón y puse la tarjeta adentro y entonces, esparcié los esprays que me vinieron con el kit también. Primero añadí el de color azul y luego el color oro. Como dije antes, esto ya no está disponible pero hay muchos sprays de colores que pueden servir para tintar fondos, como por ejemplo, los sprays Color Shine de Heidi Swapp. Una vez que terminé de esparciar los esprays, eliminé el exceso de tinta utilizando una servilleta mientras iba secando con la pistola de calor, especialmente quité color de las áreas en las que había estampado los sellos de estrellas y la frase antes. Me quedé sorprendida porque lo que antes era blanco, ahora era ¡un color azul neón!
Images | Imágenes
I decided to add some images to my panel. I picked the sheep stamp from the main set and stamped on white cardstock using Versafine Ink Onyx Black that it is used for detailed stamping. I used the coordinating dies to cut these sheep and I reserved them to mount my card later.
I also cut some clouds onto white fun foam and also I reserved them to put them together at the end.
Como el fondo ya tenía mucho brillo, decidí que si añadía imágenes, tendrían que ser pequeñas y no demasiadas porque le quitarían su encanto a la tarjeta. Por ello, escogí un sello pequeño de una oveja que había en el set, y lo estampé varias veces en una cartulina blanca aparte, utilizando una tinta negra especial para detalles, la Versafine Ink Onyx Black. Estas ovejas las recorté también utilizando los troqueles coordinados con las imágenes y utilizando para ello la Big Shot. Si no hay troqueles, no pasa nada, basta con cortar las imágenes con unas tijeras. Estos los dejé a un ladito para después montarlo todo, una vez que lo haya dejado todo preparado para montarla a la base de la tarjeta.
Además, también corté unas nubes en goma eva blanca utilizando los mismos troqueles que al principio.
Card Mounting | Montaje
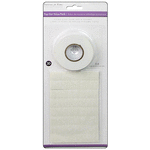
I adhered my main panel to my white card base. As you can see, my panel was a little bit smaller than my card base in order to leave that white border around it. What's more, I fit the fun foam clouds onto the gaps of the clouds to give a little of dimension to my card and added the two sheep using 3D foam tape, too. With this, the card is not so plain.
Para el montaje de la tarjeta, cogí el panel principal y lo pegué a la tarjeta principal. Como pueden ver en las imagenes de la tarjeta, el panel principal es un poco más pequeño que la base para así, dejar ese borde blanco alrededor. Además, cubrí los huecos de las nubes del fondo con las piezas de nubes de goma eva para darle un poco de dimensión a la tarjeta y pegué dos ovejitas, las que había hecho previamente, utilizando cinta adhesiva de goma eva, también para dar un poco más de dimensión y para que la tarjeta no quedara tan plana.
Embellishments | Adornos
For final touches, I just added some star sequins that I already have in my stash and some dots of Ranger Glossy Accents.
Para adornar, recordé que tenía unas estrellitas con las lentejuelas y las utilicé para esta tarjeta. Finalmente, también añadí unos puntos de Glossy Accents.
And that's the card for this afternoon!
I hope you like it.
See you soon.
¡Y este es el resultado! Espero que les haya gustado la tarjeta de hoy y espero verlos muy pronto.
¡Gracias!
I stamped these images and my sentiment using Versamark ink added the white embossing powder and heat set it.
Para el fondo, elegí los troqueles de nubes que vinieron con el kit de Hero Arts. Para ello, utilicé cartulina negra de Hero Arts. Sin embargo, los troqueles de nubes ya no están disponible puesto que se agotan rápidamente pero hay muchos troqueles de nubes de diferentes marcas, e incluso Hero Arts vende su famoso nesting clouds en la que vienen muchísimas nubes de diferentes tamaños y su precio es bastante accequible si comparamos con todos los troqueles que trae. Para cortar estos troqueles, utilicé mi Big Shot y después estampé mi frase y algunos sellitos de estrellas en todo el panel principal. Y lo mismo aquí, no tiene que ser sellos del kit, simplemente se puede realizar con sellos que tengamos en casa.
Estampé las imagenes utilizando el tampón de Tinta de Versamark y a continuación añadí polvos de embossing blancos y los sequé con la pistola de calor.
Then, I took one empty carton box and put my card inside and split the shimmer mists on it. First, I used the blueberry shimmer and then, the gold one. As these two shimmers are sold out on Hero Arts Shop, you can purchase some others products that are a bit similar to these ones, such as Heidi Swapp Color Shine. Once I finished, I removed the excess of the sprays with a tissue while I was drying with my heat gun. Before everything was complete dried, I removed with the tissue (or a cloth) the shimmers from the stamps - the stars and the sentiment. I noticed when I removed the excess of the shimmers from my images, I realized that they were beautiful... like a neon look!
Cogí una caja de cartón y puse la tarjeta adentro y entonces, esparcié los esprays que me vinieron con el kit también. Primero añadí el de color azul y luego el color oro. Como dije antes, esto ya no está disponible pero hay muchos sprays de colores que pueden servir para tintar fondos, como por ejemplo, los sprays Color Shine de Heidi Swapp. Una vez que terminé de esparciar los esprays, eliminé el exceso de tinta utilizando una servilleta mientras iba secando con la pistola de calor, especialmente quité color de las áreas en las que había estampado los sellos de estrellas y la frase antes. Me quedé sorprendida porque lo que antes era blanco, ahora era ¡un color azul neón!
Images | Imágenes
I decided to add some images to my panel. I picked the sheep stamp from the main set and stamped on white cardstock using Versafine Ink Onyx Black that it is used for detailed stamping. I used the coordinating dies to cut these sheep and I reserved them to mount my card later.
I also cut some clouds onto white fun foam and also I reserved them to put them together at the end.
Como el fondo ya tenía mucho brillo, decidí que si añadía imágenes, tendrían que ser pequeñas y no demasiadas porque le quitarían su encanto a la tarjeta. Por ello, escogí un sello pequeño de una oveja que había en el set, y lo estampé varias veces en una cartulina blanca aparte, utilizando una tinta negra especial para detalles, la Versafine Ink Onyx Black. Estas ovejas las recorté también utilizando los troqueles coordinados con las imágenes y utilizando para ello la Big Shot. Si no hay troqueles, no pasa nada, basta con cortar las imágenes con unas tijeras. Estos los dejé a un ladito para después montarlo todo, una vez que lo haya dejado todo preparado para montarla a la base de la tarjeta.
Además, también corté unas nubes en goma eva blanca utilizando los mismos troqueles que al principio.
Card Mounting | Montaje
I adhered my main panel to my white card base. As you can see, my panel was a little bit smaller than my card base in order to leave that white border around it. What's more, I fit the fun foam clouds onto the gaps of the clouds to give a little of dimension to my card and added the two sheep using 3D foam tape, too. With this, the card is not so plain.
Para el montaje de la tarjeta, cogí el panel principal y lo pegué a la tarjeta principal. Como pueden ver en las imagenes de la tarjeta, el panel principal es un poco más pequeño que la base para así, dejar ese borde blanco alrededor. Además, cubrí los huecos de las nubes del fondo con las piezas de nubes de goma eva para darle un poco de dimensión a la tarjeta y pegué dos ovejitas, las que había hecho previamente, utilizando cinta adhesiva de goma eva, también para dar un poco más de dimensión y para que la tarjeta no quedara tan plana.
Embellishments | Adornos
For final touches, I just added some star sequins that I already have in my stash and some dots of Ranger Glossy Accents.
Para adornar, recordé que tenía unas estrellitas con las lentejuelas y las utilicé para esta tarjeta. Finalmente, también añadí unos puntos de Glossy Accents.
YouTube Video
I hope you like it.
See you soon.
¡Y este es el resultado! Espero que les haya gustado la tarjeta de hoy y espero verlos muy pronto.
¡Gracias!









.jpg)


