Hello! It's me, Cha. In this post, I'm going to talk about small stamps, especially sentiment stamps that we often collect when we buy stamp sets. We can use few of them or just one as I did in this today's post.
In today's post, I used some tools that I didn't buy at all. I mean that I made by myself (my DIY videos) so that I could save some money to buy other things that I would like to try. I will link my DIY videos at the end of the post and also, I'll link the products supplies (even the ones that I 'hacked').
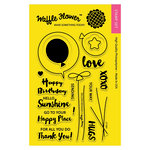
For this post, I used Waffle Flower Stamp set called Balloon Messages. I decided to create this card on the same cardstock, so I also did an Ink Resist Technique using ultra fine clear embossing powders.
Ink Resist Technique on my images
For this card, I first created my images using my DIY Stamping Tool (or Misti Stamping Tool). I placed my white cardstock (4 1/2 inches by 5 5/8 inches) on my stamping tool and I took the solid balloon. I positioned it in my Stamping tool and stamped it on my cardstock adding three colors of Distress Oxide Inks. I stamped two balloons on my card. Then, I stamped the black fine line on the previous colored balloons. When it was done, I positioned again the solid balloon on the two balloons, first one and then to the another one, and I stamped using Versamark Ink to emboss my images with clear embossing powder and heat it later.
This is one of the ways to do Ink Resist Technique. Now, I could do some stamping on the background without contaminating my images.
Background
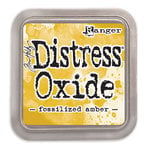
I positioned my card on my DIY stamping tool again. I decided to create the background with the 'Love' stamp word (which is included in the same set). I placed the stamp out the paper and I stamped on it with Fossilized Amber Distress Oxide Ink, then I stamped it again on the same place but with Versamark ink. Before embossing the image, I finished stamping all the line with the same stamp and the same color. Once I finished, I embossed the words again with Ultra Fine Clear Embossing Powder. I had to remove some powders from my images and my card with a brush and then, I heat it up. I did the same with the other lines until I stamped the whole paper, but I used different colors but embossed with the same clear embossing powder.
Embellishments
I did several final touches before mounting my card.
First, I wanted some color on my background, so I decided to color using Broken China Distress Oxide Ink.
Secondly, I wanted that the word 'love' that is on the whole card was part of my sentiment itself, so I just decided to stamp the word 'sending' between the words and next to one of the balloons.
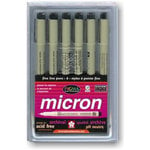
Thirdly, I stamped a small heart using Fired Brick Distress Oxide Ink several times. I did some black fine lines using a black pen on the hearts and also drew the strings that hold the balloons.
Finally, I wanted my images to have some dimension. For that, I just took my Glossy Accents and added it on the balloons and on the hearts.
Card Mounting
I adhered a piece of black cardstock on my white card base. I had to trim a little bit the main panel first in order to see the black edges underneath. I also cut a piece of black foam sheet (also for a little bit more dimension) and glued on the main card. Finally, I attached the main panel to the card base in which I adhered the black cardstock before.
And this is the result!
YouTube Video
I created another card with the same techniques as the previous one and using also the same stamp set from Waffle Flower.
DIY Stamping Tool
DIY Ink Blending Tools











.jpg)


